
Air plant care is straightforward once you understand how these unusual plants collect moisture and why they need to dry between waterings. Most air plants (Tillandsia species) grow best with bright, indirect light, regular thorough watering, warm conditions, and good air circulation. They do not need potting soil, but they cannot survive on air alone.
What Makes Air Plants Different?
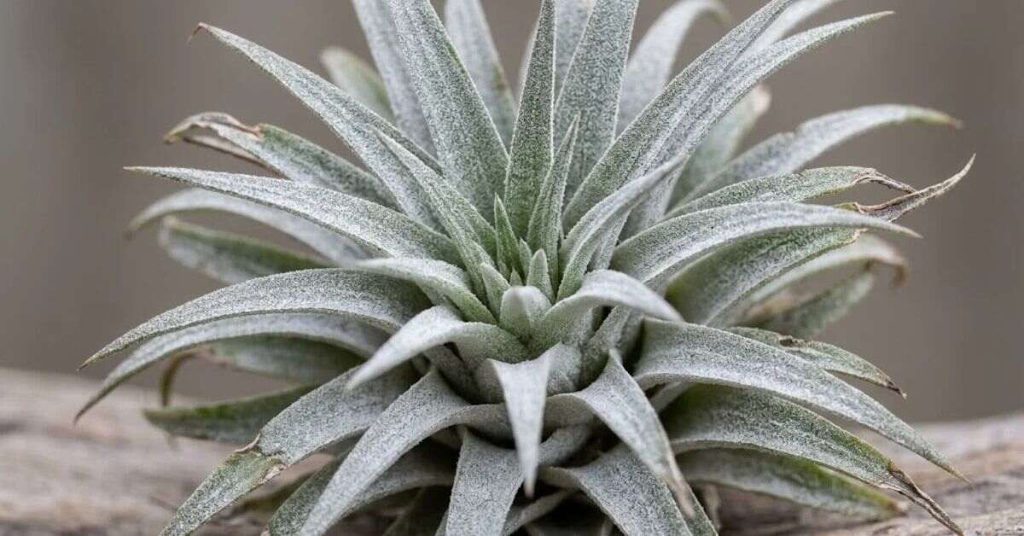
Air plants belong to the bromeliad family, Bromeliaceae. Many are epiphytes, which means they grow attached to tree branches, bark or other surfaces instead of rooting in soil. They use their roots mainly to anchor themselves rather than to absorb most of their water and nutrients.
Their leaves contain specialized structures called trichomes. These tiny, scale-like structures help collect moisture and dissolved nutrients from rain, dew and other sources. On silver-leaved species, trichomes create the soft, frosted appearance that makes the foliage look almost metallic.
This unusual biology explains why air plant care focuses on the leaves, drainage and airflow rather than on soil moisture.
Air Plant Care: Quick Reference
| Care factor | Recommended conditions |
| Light | Bright, indirect light |
| Water | Provide a complete soil drench or leaf rinse, adjusting moisture delivery according to the species and room conditions. |
| Soil | None required for typical epiphytic Tillandsia |
| Temperature | Around 60–80°F (16–27°C) is a practical indoor target |
| Humidity | Moderate humidity with good ventilation |
| Fertilizer | Optional, diluted air plant or bromeliad fertilizer |
| Growth habit | Epiphyte; roots mainly provide attachment |
| Difficulty | Moderate; drying correctly is essential |
These conditions are a starting point rather than a rigid formula. A thick-leaved, silver air plant may tolerate drier conditions than a greener, softer-leaved species.
Watering Air Plants Correctly
Water management is the most important part of air plant care. The goal is to wet the foliage thoroughly and then allow excess water to escape before it sits inside the plant’s base.
Soaking and rinsing
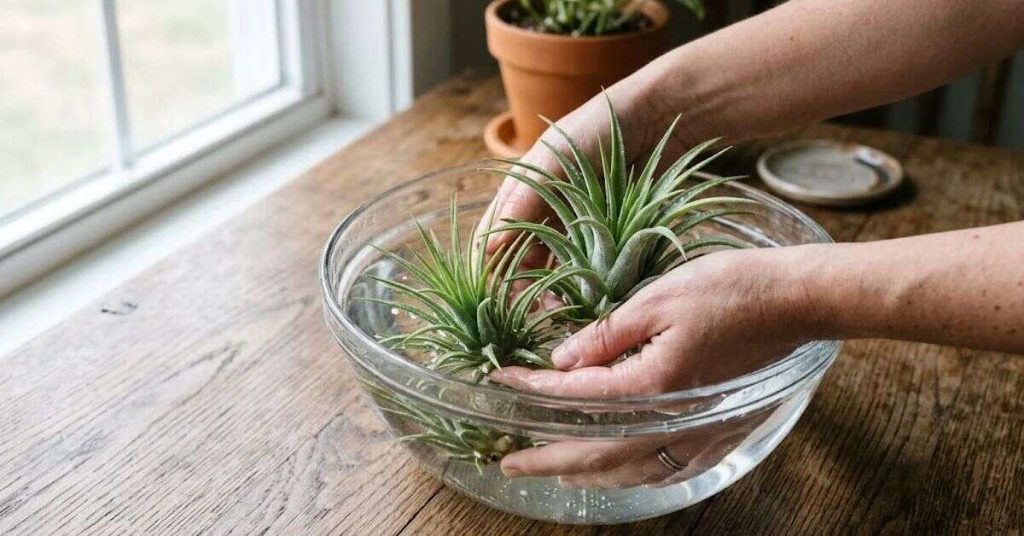
For a typical indoor Tillandsia, begin with a thorough soak lasting approximately 20–30 minutes once a week. In a hot, dry room, watering may be needed more frequently; in a cool, humid room, it may be needed less often. Species such as Tillandsia xerographica may prefer less frequent or shorter soaking than some greener varieties.
Use clean, room-temperature water. Rainwater is a good option when collected cleanly. Spring water or suitable low-mineral tap water can also work. Avoid relying on distilled or reverse-osmosis water indefinitely as the only water source unless you have an appropriate mineral or fertilizer plan.
After soaking, gently shake off excess water. Place the plant upside down or on its side in a ventilated area until the leaves and base are completely dry.
Misting is supplemental
Misting can help between thorough waterings, especially in warm, dry conditions. However, a light spray may wet only the outer leaf surfaces and fail to hydrate the entire plant.
If you cannot remove a mounted air plant for soaking, rinse or spray it thoroughly enough to wet the leaves. Then tilt the mount to release trapped water and ensure the plant can dry.
How to recognize watering problems
- Dehydration: Leaves may curl inward, wrinkle or look unusually limp.
- Possible rot: The base becomes soft, dark or mushy, and lower leaves may detach easily.
- Mineral buildup: Chalky deposits may appear on the foliage after repeated watering with hard water.
Do not respond to every brown leaf tip by adding more water. Inspect the base and consider light intensity, mineral deposits and drying conditions before changing your routine.
Light Requirements for Healthy Growth
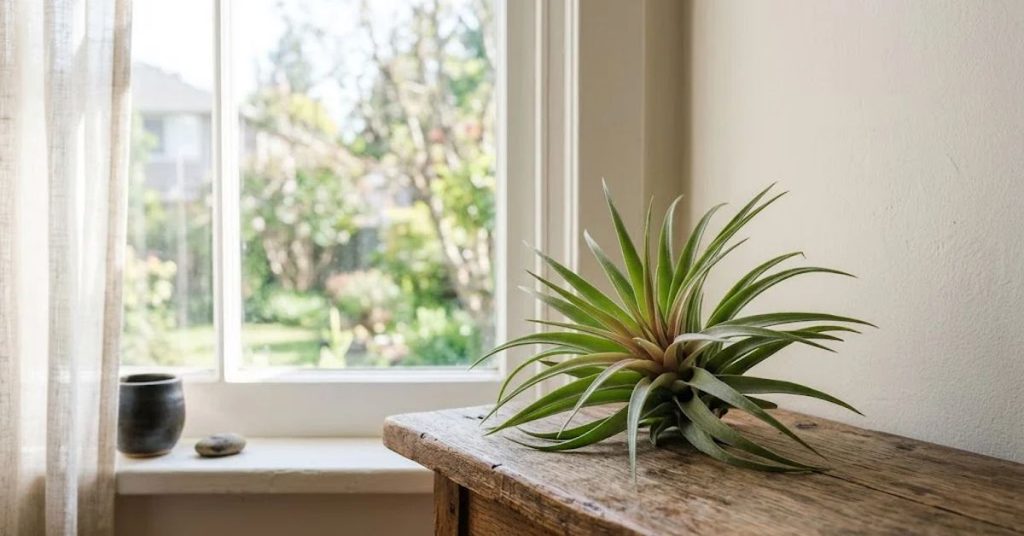
Place air plants near a bright window where sunlight is filtered through a curtain or reflected off nearby surfaces. East-facing windows often provide gentle morning light, while west- or south-facing windows may require more protection during hot afternoons.
Direct sun can scorch foliage, particularly behind glass where temperatures rise quickly. Conversely, a dark shelf may prevent healthy growth even if the plant is watered correctly.
If natural light is limited, a suitable full-spectrum LED grow light can provide supplemental illumination. Follow the fixture’s recommended distance and duration instead of placing the plant directly against a powerful lamp.
A useful placement test is to check the plant during the brightest part of the day. If it receives intense, hot sun for hours, move it farther back or filter the light. If the location remains gloomy throughout the day, choose a brighter position.
Temperature, Humidity and Airflow
Most commonly sold air plants grow well in ordinary warm indoor conditions. Avoid frost, sudden temperature changes and prolonged exposure to cold drafts. A room that stays roughly between 60 and 80°F is a sensible starting point for many varieties, although individual species differ.
Humidity helps slow moisture loss from the leaves, but high humidity does not replace watering. An air plant in a humid bathroom can still become dehydrated if it never receives enough water.
Air circulation is equally important. A gentle breeze from an open window or a nearby fan helps remove moisture after soaking. Do not direct a strong fan at the plant continuously, particularly in a very dry room.
In humid conditions, allow extra time for drying and avoid leaving water trapped in the center of the plant.
The Best Displays for Air Plants
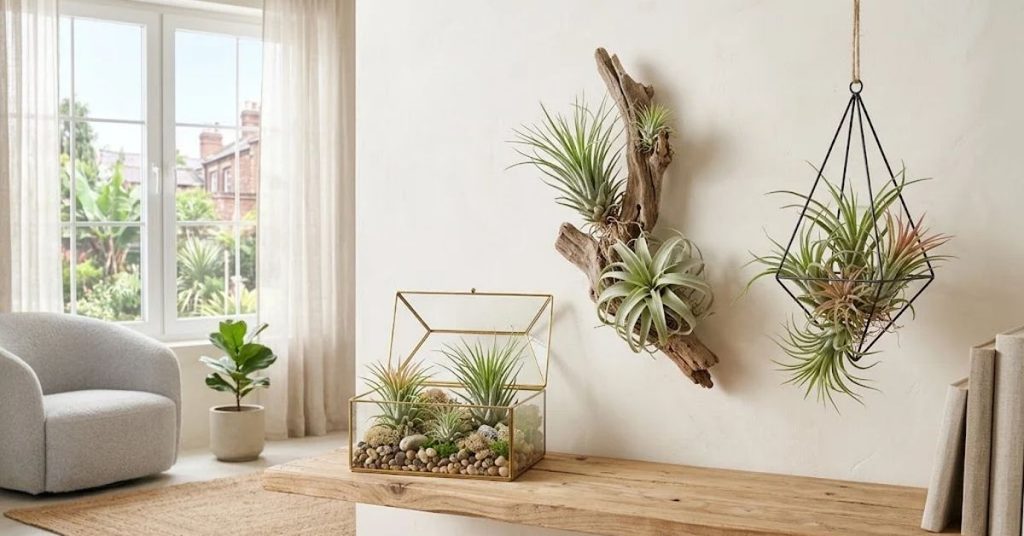
Air plants are ideal for compact spaces because they can be displayed without conventional pots.Even so, a proper display container or stand must securely hold the plant without creating trapped moisture or stagnant humidity around the base.
Open glass terrariums
Open-sided or open-top glass containers can work when they provide adequate ventilation and room for the plant to dry. Avoid sealed terrariums, especially if the air plant remains inside while wet.
Driftwood and decorative bark
Untreated, dry wood and bark can provide an attractive mounting surface. Secure the plant gently with plant-safe wire or a suitable attachment method, taking care not to crush the leaves or cover the growing center with adhesive.
Hanging wire planters
Wire holders allow air to circulate around the foliage and make it easier to remove the plant for watering. Choose a design that supports the plant securely without squeezing its base.
Minimalist desk planters
Small ceramic dishes, open metal stands and simple holders can highlight the plant’s shape without requiring soil. Choose a holder that does not collect standing water, and keep the plant away from hot computer exhaust or heating vents.
Display rule: If a decorative arrangement makes it difficult to remove, rinse or dry the plant, change the arrangement rather than sacrificing the plant’s health.
A Practical Wet–Drain–Dry–Inspect Routine
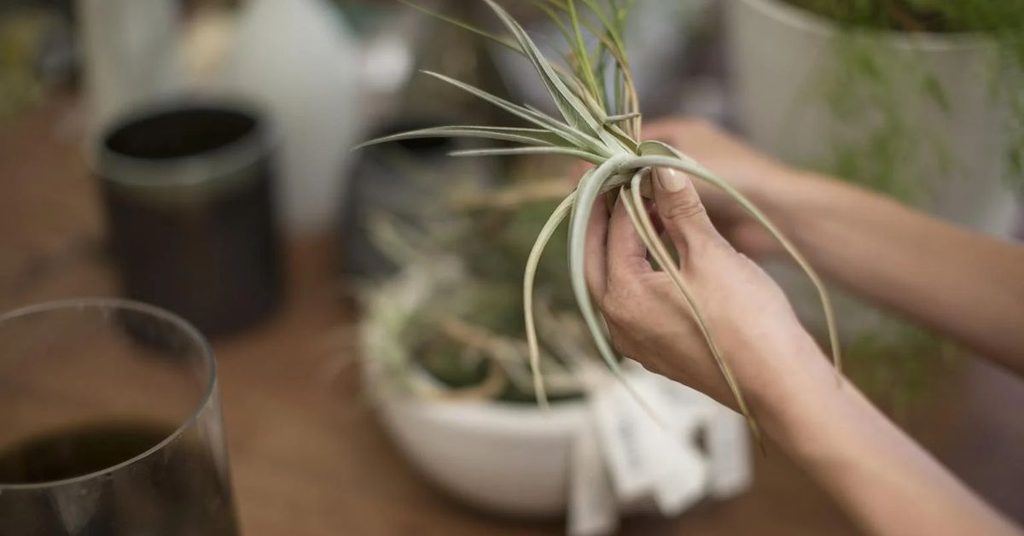
The easiest way to make air plant care consistent is to follow the same sequence after every thorough watering.
- Wet: Soak or thoroughly rinse the plant using clean water.
- Drain: Gently shake away droplets and empty water from the center, where possible.
- Dry: To dry, suspend or lay the plant upside down or on its side in indirect sunlight with steady airflow.
- Inspect: Check the base and leaf joints before returning the plant to its display.
Complete drying within a few hours is optimal, but real-time speed depends on temperature, humidity, airflow, and plant shape; bulbous plants hold internal water much longer than fine-foliaged types.
If a plant remains wet for much of the day, improve ventilation, change the mounting angle or move it to a more open location. Do not simply shorten the drying period to fit a display.
Feeding Air Plants
Air plants need nutrients, although frequent feeding is unnecessary for many indoor specimens. Use dedicated air plant or bromeliad plant food, ensuring you dilute the product as instructed on the package.
A conservative starting point is occasional feeding during active growth, such as monthly in spring and summer. Avoid applying concentrated fertilizer directly to dry leaves, and do not assume that a stronger solution will produce faster growth.
Mineral-heavy water and fertilizer residue can accumulate on the foliage. If you notice deposits or stressed leaf tips, review your water quality and feeding routine before adding more fertilizer.
Flowering and Air Plant Pups
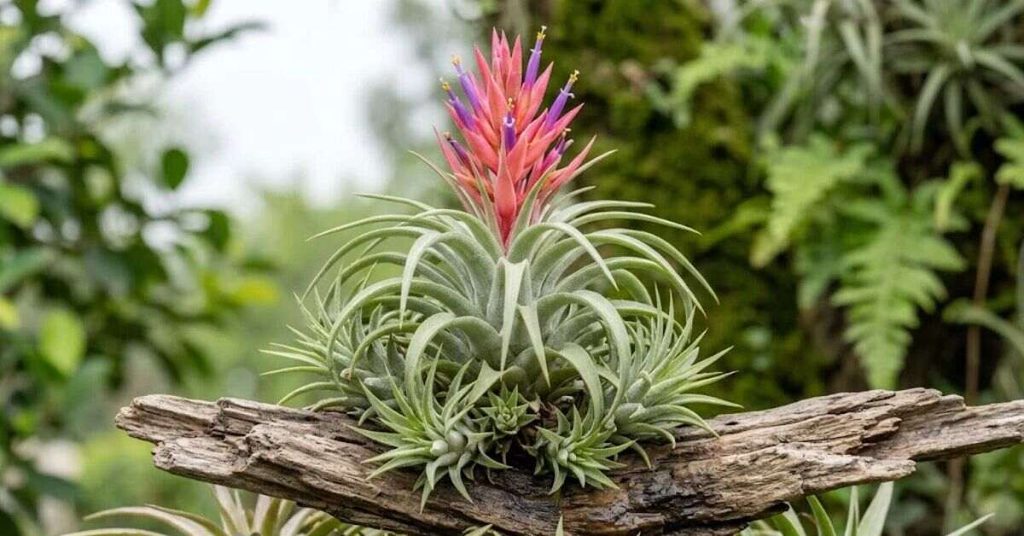
A mature air plant may produce a flower spike with colorful bracts or small tubular flowers. Flowering depends on the species, maturity and growing conditions; there is no universal blooming date for all Tillandsia.
Many species produce offsets, commonly called pups, around the base before or after flowering. The original rosette often gradually declines after blooming, but its pups can continue growing.
Allow an offset to develop before separating it.A practical guideline is to separate pups only after they reach roughly one-third of the mother plant’s size and can be cleanly detached without tearing core basal tissue.
Use clean fingers or a suitable tool to separate an offset carefully. If the pup remains firmly attached, give it more time rather than forcing it away. Young plants require the same foundational balance of light, moisture, and airflow as mature specimens, scaled appropriately for their smaller size.
Growing air plants from seed is also possible, but it generally requires more time and controlled conditions than raising offsets.
Common Problems and Fixes
Brown leaf tips: Low humidity, insufficient watering, intense sunlight or mineral buildup may be responsible. Check the leaf texture, water quality and light exposure before deciding which condition to change.
Curled or wrinkled leaves: The plant may be dehydrated. Give it a thorough soak, allow excess water to drain and review whether the room is unusually hot or dry.
Soft, black or mushy base: These are warning signs of rot. Remove standing water, improve airflow and inspect whether healthy tissue remains. If the growing center has extensively rotted, recovery may not be possible.
Leaves falling away easily: A few aging lower leaves may be normal, but widespread leaf loss combined with a soft base suggests serious stress or rot.
Bleached or scorched patches: Move the plant away from harsh direct sunlight and check whether heat is accumulating behind a window.
Slow growth: Low light, unsuitable temperatures or a plant that has not yet reached maturity may explain the problem. Correct the growing conditions before increasing fertilizer.
White deposits: Hard-water minerals or fertilizer salts may have collected on the leaves. Switch to a more suitable water source and avoid unnecessary feeding.
Change one or two conditions at a time and observe the plant’s response. Making several drastic changes simultaneously can create additional stress and make the original problem harder to identify.
Frequently Asked Questions
Q1: How often should I water an air plant?
Ans: Many indoor air plants can start with a thorough weekly soak, but their needs vary with species, temperature, humidity and airflow. Check the foliage and ensure the plant dries fully after every watering.
Q2: Can air plants grow without soil?
Ans: Yes. Typical epiphytic Tillandsia use their roots solely for anchoring to surfaces, absorbing the majority of their water and nutrients through specialized leaf scales.
Q3:Can air plants thrive on misting alone, or is complete immersion necessary?
Ans: Not always. Light misting may provide too little moisture, so thorough rinsing or soaking is often more reliable for plants that can be removed from their displays.
Q4: Can air plants live in a closed glass terrarium?
Ans: A sealed terrarium is generally unsuitable because moisture can remain trapped around the plant. Choose an open container with adequate airflow and remove the plant for thorough drying when needed.
Q5: What causes leaf browning on air plants?
A: Brown spots or patches can stem from underwatering, intense sun exposure, excess mineral accumulation, or root/stem rot. Dry, crispy tips suggest different problems from a soft, darkened base, so inspect the affected tissue before changing your care routine.
Q6: Do air plants need fertilizer?
Ans: Fertilizer is optional but can support growth when used sparingly. Choose a suitable air plant or bromeliad product and follow its dilution instructions.
Q7: What happens to an air plant after it flowers?
Ans: Many Tillandsia gradually decline after flowering while producing new offsets. Keep caring for the parent plant while its pups develop, then remove it once it has completely died.
Q8: Are air plants suitable for beginners?
Ans: Yes, provided you meet the core requirements of bright lighting, routine watering, and proper airflow. They are soil-free, but they still need a consistent care routine.
Final Thought
Successful air plant care comes down to understanding the plant rather than relying on a fixed calendar. Give your Tillandsia enough light, wet the leaves thoroughly, allow the plant to drain and dry, and choose a display that does not trap moisture. With those habits in place, these unusual plants can add long-lasting greenery to desks, shelves, hanging displays and other small indoor spaces.